1. SCOPE
This SAE Standard is intended to establish uniform methods for testing certain types of carbon steel and alloy steel tubing listed in 2.1.1. The specified test and performance criteria applicable to each variety of tubing are set forth in the respective SAE J Specifications.
2. REFERENCES
2.1 Applicable Publications
The following publications form a part of this information report to the extent specified. The latest issue of each publication shall apply.
2.1.1 SAE Publications
Available from SAE International, 400 Commonwealth Drive, Warrendale, PA 15096-0001, Tel: 877-606-7323 (inside USA and Canada) or 724-776-4970 (outside USA), www.sae.org.
SAE J356 Welded Flash-Controlled Low-Carbon Steel Tubing Normalized for Bending, Double Flaring, and Beading
SAE J518 Hydraulic Flanged Tube, Pipe, and Hose Connections, Four-Bolt Split Flange Type
SAE J524 Seamless Low-Carbon Steel Tubing Annealed for Bending and Flaring
SAE J525 Welded and Cold Drawn Low-Carbon Steel Tubing Annealed for Bending and Flaring
SAE J526 Welded Low-Carbon Steel Tubing
SAE J527 Brazed Double Wall Low-Carbon Steel Tubing
SAE J533 Flares for Tubing
SAE J1065 Nominal Reference Working Pressures for Steel Hydraulic Tubing
SAE J1453-1 Specification for O-Ring Face Seal Connectors: Part 1—Tube Connection Details and Common Requirements for Performance and Tests
SAE J1453-2 Specification for O-Ring Face Seal Connectors: Part 2—Requirements, Dimensions, and Tests for Steel Unions, Bulkheads, Swivels, Braze Sleeves, Caps, and Connectors with ISO 6149-2 Metric Stud Ends
SAE J1453-3 Specification for O-Ring Face Seal Connectors: Part 3—Requirements, Dimensions, and Tests for Steel Unions, Bulkheads, Swivels, Braze Sleeves, Connectors, Caps, and Connectors with SAE J1926-2 Inch Stud Ends
SAE J2435 Welded Flash Controlled, SAE 1021 Carbon Steel Tubing, Normalized for Bending, Flaring, and Beading
SAE J2467 Welded and Cold-Drawn, SAE 1021 Carbon Steel Tubing Normalized for Bending and Flaring
SAE J2592 Carbon Steel Tubing for General Use—Understanding Nondestructive Testing for Carbon Steel Tubing
SAE J2613 Welded Flash Controlled, High Strength Low Alloy Steel Hydraulic Tubing, Sub-Critically Annealed for Bending, Double Flaring, and Bending
SAE J2614 Welded and Cold-Drawn, High Strength Low Alloy Steel Hydraulic Tubing, Sub-Critically Annealed for Bending and Flaring
SAE J2832 Welded Flash Controlled, High Strength (690 MPa Tensile Strength) Low Alloy Steel Hydraulic Tubing, Stress Relieved Annealed for Bending and Double Flaring
SAE J2833 Welded and Cold-Drawn, High Strength (690 MPa Tensile Strength) Low Alloy Steel Hydraulic Tubing, Stress Relieved Annealed for Bending and Flaring
2.1.2 ASTM Publications
Available from ASTM International, 100 Barr Harbor Drive, P.O. Box C700, West Conshohocken, PA 19428-2959, Tel: 610-832-9585, www.astm.org.
ASTM A 370 Standard Methods and Definitions for Mechanical Testing of Steel Products
ASTM A 450/A 450M Standard Specification for General Requirements for Carbon, Ferritic Alloy, and Austenitic Alloy Steel Tubes
ASTM E 8 Test Methods for Tension Testing of Metallic Materials
ASTM E 8M Test Methods for Tension Testing of Metallic Materials [Metric]
2.2 Related Publications
The following publications are for information purposes only and are not a required part of this document.
2.2.1 SAE Publications
Available from SAE International, 400 Commonwealth Drive, Warrendale, PA 15096-0001, Tel: 877-606-7323 (inside USA and Canada) or 724-776-4970 (outside USA), www.sae.org.
SAE J514 Hydraulic Tube Fittings
SAE J1290 Automotive Hydraulic Brake System—Metric Tube Connections
SAE J2551 Recommended Practices for Fluid Conductor Metallic Tubing Applications
SAE J2593 Information Report for the Installation of Fluid Conductors and Connectors
SAE J2658 Metallic Tube Conductor Assemblies for Fluid Power and General Use—Test Methods for Hydraulic Fluid Power Metallic Tube Assemblies
2.2.2 ISO Publications
Available from ANSI, 25 West 43rd Street, New York, NY 10036-8002, Tel: 212-642-4900, www.ansi.org.
ISO 2944 Fluid power systems and components—Nominal pressures
ISO 3304 Plain end seamless precision steel tubes—Technical conditions for delivery
ISO 3305 Plain end welded precision steel tubes—Technical conditions for delivery
ISO 4397 Connectors and associated components—Nominal outside diameters of tubes and nominal inside diameters of hoses
ISO 4399 Connectors and associated components—Nominal pressures
ISO 4406 Hydraulic fluid power—Fluids—Method for coding the level of contamination by solid particles
ISO 5598 Fluid power systems and components—Vocabulary
ISO 6162-1 Hydraulic fluid power—Flange connectors with split or one-piece flange clamps and metric or inch screws—Part 1: Flange connectors for use at pressures of 3.5 MPa (35 bar) to 35 MPa (350 bar), DN 13 to DN127
ISO 6162-2 Hydraulic fluid power—Flange connectors with split or one-piece flange clamps and metric or inch screws—Part 2: Flange connectors for use at pressures of 35 MPa (350 bar) to 40 MPA (400 bar), DN 13 to DN 51
ISO 6605 Tests and test procedures
ISO 8434-1 Metallic tube connections for fluid power and general use—Part 1: 24° Compression connectors
ISO 8434-2 Metallic tube connections for fluid power and general use—Part 2: 37° Flared connectors
ISO 8434-3 Metallic tube connections for fluid power and general use—Part 3: O- ring face seal connectors
ISO 8434-4 Metallic tube connections for fluid power and general use—Part 4: 24° Cone connectors with ring weld-on nipples
ISO 10583 Test methods for tube connections
ISO 10763 Plain-end, seamless and welded steel tubes—Dimensions and nominal working pressures
3. TEST PROCEDURES
Unless otherwise specified, the test procedures described in the current issue of ASTM A 370 Standard Methods and Definitions for Mechanical Testing of Steel Products shall be followed.
However, in cases of conflict between the ASTM specifications and those described herein, this SAE specification shall take precedence.
3.1 Test Frequency
There are many factors which can affect the required frequency of these tests, including:
a. Tube size
b. Production run quantity
c. Type of production equipment
d. Production methods
e. End use
f. Material
Therefore, it shall be the responsibility of the manufacturer and user to establish the test type and test frequency that will produce tubing which conforms to the SAE Standards as well as the needs and requirements of the user.
4. TEST SPECIMENS
In accordance with ASTM A 370 Standard Methods and Definitions for Mechanical Testing of Steel Products, test specimens for mechanical tests shall be smooth on the ends and free from flaws. If any test specimen exhibits burrs, flaws or defective machining before testing, it may be discarded and another specimen may be selected. Test specimens shall be taken from tubing which has not been subjected to subsequent operations after being manufactured to the applicable specification. All tests shall be conducted at room temperature.
5. PERFORMANCE TESTS
The tests listed in this section are selected and performed based on agreement between the supplier and customer.
5.1 Flattening Test
Test specimens approximately 75 mm in length shall not crack or show any flaws when flattened between parallel plates to a distance equal to three times the wall thickness of the section under test. For welded tubing, the weld shall be placed at 90° from the direction of applied force. Superficial ruptures resulting from minor surface imperfections shall not be
considered cause for rejection.
5.2 Reverse Flattening Test
Test specimens shall be split longitudinally 90° on each side of the weld. The section containing the weld shall be opened and flattened with the weld at the point of maximum bend. There shall be no evidence of cracks or metal flaking, or lack of weld penetration or overlaps resulting from flash control or flash removal in the weld.
5.3 Bending Test
If a bend is required, the customer shall specify a suitable test method at the time of purchase.
5.4 Expansion Test
Test specimens shall be subjected to expansion over a hardened tapered plug having a slope of 0.1 to 1.0, until the outside diameter has been expanded 25% without evidence of cracking or flaws.
5.5 Flaring Test
5.5.1 SAE J533 37° and 45° Flares
5.5.1.1 Double Flare—Method A
Test sections having squared and deburred ends shall withstand being double flared at one end to the dimensions shown in SAE J533. The test section shall be held firmly and squarely in the die and the punch, while being forced down, and shall be guided parallel to the axis of the tubing. The flare shown in Figure 1 shall exhibit no evidence of splitting or flaws.
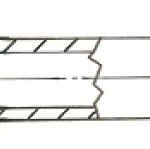
FIGURE 1 – 37° DOUBLE FLARED TUBING -METHOD A
(REF: SAE J533)
5.5.1.2 Double Flare—Method B
Test sections having squared and deburred ends shall withstand being single flared at one end to the dimensions shownin SAE J533. The test section shall be held firmly and squarely in the die and the punch, while being forced down and shall be guided parallel to the axis of the tubing. The flare shown in Figure 2 shall exhibit no evidence of splitting or flaws except that a separation of the outer lap joint shall be permissible providing it does not exceed 3.1 mm in length and is confined to the outer thickness only.
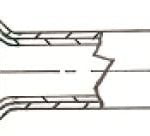
FIGURE 2 – 37° DOUBLE FLARED DOUBLE WALL TUBING – METHOD B
(REF: SAE J533)
5.5.1.3 Single Flare
Test sections having squared and deburred ends shall withstand being single flared at one end to the dimensions shown in SAE J533. The test section shall be held firmly and squarely in the die and the punch, while being forced down, and shall be guided parallel to the axis of the tubing. The flare shown in Figure 3 shall exhibit no evidence of splitting or flaws.
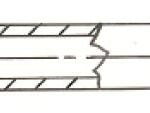 FIGURE 3 – 37° SINGLE FLARED TUBING
(REF: SAE J533)
5.5.2 SAE J1453 ORFS and SAE J518 Flares
5.5.2.1 Double Flare
Test sections having squared and deburred ends shall withstand being double flared at one end to the dimensions shown in SAE J1453 and SAE J518 Flares. The test section shall be held firmly and squarely in the die and the punch, while being forced down and shall be guided parallel to the axis of the tubing. The flare shown in Figure 4 shall exhibit no evidence of splitting or flaws.
 FIGURE 4 – ORFS DOUBLE FLARED TUBE END
(REF: SEE SAE J1453 AND SAE J518 FLARES)
5.5.2.2 Single Flare
Test sections having squared and deburred ends shall withstand being single flared at one end to the dimensions shown in SAE J1453 and SAE J518 Flares. The test section shall be held firmly and squarely in the die and the punch, while being forced down and shall be guided parallel to the axis of the tubing. The flare shown in Figure 5 shall exhibit noevidence of splitting or flaws.
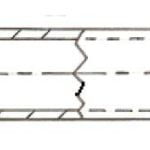
FIGURE 5 – ORFS SINGLE FLARED TUBE END
(REF: SEE SAE J1453 AND SAE J518 FLARES)
5.6 Hardness Test
Hardness tests shall be made on the inside surface of test specimens. This test is not required on tubing with a nominal wall less than 1.7 mm thick. Such tubing shall meet all other mechanical properties and performance requirements.
5.7 Tensile
The test procedures described in the current issue of ASTM E 8—Test Methods for Tension Testing of Metallic Materials or ASTM E 8M—Test Methods for Tension Testing of Metallic Materials [Metric] shall be followed.
5.8 Elongation Test
If the percentage of elongation of the test specimen is less than that specified in the applicable tube specification, and/or any part of the fracture is more than 19 mm from the center of the gage length, as indicated by scribed marks on the specimen before testing, a retest shall be allowed.
5.9 Proof Pressure Test
When required, the tubing shall be tested hydrostatically to two times its calculated 4 to 1 reference working pressure. This proof pressure test will subject the material to an appropriate stress level to determine the tube’s ability to perform within its elastic limits. There shall be no evidence of failure and the tested specimen must maintain dimensional size. Test pressures shall be determined by the following derivative of SAE J1065 Reference Working Pressures for Steel Hydraulic Tubing formula:
Burst Pressure – Pb = Rm,min * In (D/d) (Eq. 1)
Pr oof Pressure −Pp = Pb/2 (Eq. 2)
where:
Pb is the nominal static reference burst pressure in MPa (mega pascals)
Pp is the nominal reference proof pressure in MPa (mega pascals)
Rm, min is the minimum tensile strength
In is the natural logarithm, also referred to as log e
D is the nominal tube outside diameter
d is the nominal tube inside diameter
No tube shall be tested beyond a hydrostatic pressure of 35 MPa unless so specified and mutually agreed upon by the supplier and customer.
NOTE: These formula and the derived nominal reference proof pressures are only applicable to tubing intended for hydraulic applications, of which, all have at least a 50% ratio of the minimum yield strength to the minimum tensile strength. When calculating nominal reference proof pressures for tube materials where this ratio falls below a 50% ratio, formula listed in SAE J1065 Pressure Ratings for Hydraulic Tubing and Fittings, “Annex A” should be used.
5.10 Nondestructive Electronic Testing
In lieu of the hydrostatic test, where mutually agreed upon by the purchaser and manufacturer, all tubing shall be tested by passing it through a nondestructive electronic test (such as eddy current, flux leakage, or ultrasonic) which is capable of detecting defects that would prevent the tubing from passing the hydrostatic pressure proof test. The tubing shall meet the requirements as stated in ASTM A 450/A 450M Standard Specification for General Requirements for Carbon, Ferritic Alloy, and Austenitic Alloy Steel Tubes, paragraph 24.10 Evaluation of Imperfections. See SAE J2592 Carbon Steel Tubing for General Use—Understanding Nondestructive Testing for Carbon Steel Tubing for information concerning the various types and uses of nondestructive electronic testing for tubing.
